
Learning how to compost at home is a vital process related to growing vegetables in your garden. Composting statistics show us that more and more households are composting every year.
This soil amendment has many benefits that contribute to the vitality of the soil in your vegetable garden.
Through my research and experience, I will go over what compost is, how to make it, why you should compost, what you should compost, how to compost at home, different composting methods, and types of composting bins for beginners. Let’s get started.
What is Compost?
According to the American Horticultural Society compost is “Decayed organic matter used as a mulch, fertilizer, or soil amendment.”
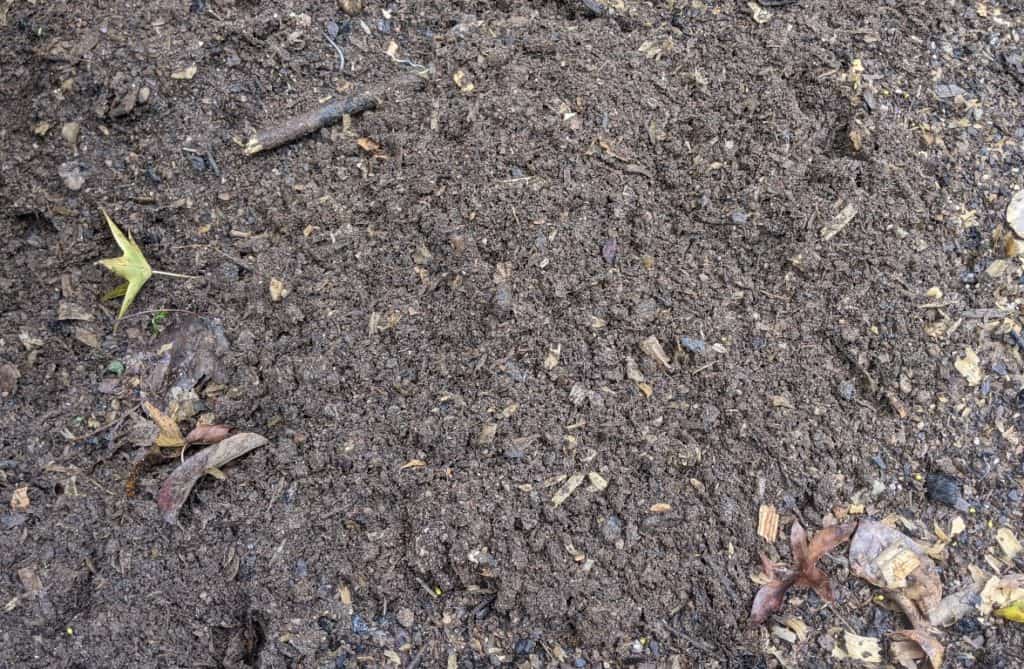
Compost is also called black gold, partially because the end product is a dark and loamy, earthy humus. Composting statistics tell that there is a growing trend in US households regarding food waste.
Gold because it can magically transform your garden, lawn, or any place that you choose to use it.

Why Should You Compost at Home
According to the EPA, food scraps and yard waste together currently make up more than 28% of what we throw away.
Since compost improves your soil and the plants growing in it, it is a practical and convenient way to recycle your yard waste and kitchen scraps.
Compost also helps to understand waste as part of a closed system and allows us to see the cycle of life as it pertains to death and decay.
Organic material can help to break up heavy clay soils, like the red clay we see here in Georgia, it can also help by adding water and nutrients to sandy soil.
All soil types can benefit from the added nutrients that compost provides.
If you pay extra for yard waste collection or if you are purchasing compost then composting can save you money.
There is also a certain joy in seeing your waste turn into rich soil.
What Food Can You Compost?
Anything that was once alive can be composted, but that doesn’t mean that it should.
For home composting avoid placing any meat, bones, dairy products, and other fatty foods (such as cooking oil) in your composting materials.
These can turn your compost rancid and also attract vermin.
The ideal kitchen scraps for composting are fruits, veggies, eggshells, and coffee grounds.
For a quicker breakdown of scraps chop them into smaller 1-inch chunks.
Fallen leaves, grass clippings, weeds, and the garden waste are also excellent compost material. Shredded newspaper and cardboard work too.
Avoid diseased plants or bug-infested plants as this will transfer through your compost to your healthy plants.
I have a few compost piles and one of those is a long term compost pile.
I don’t turn this pile, its in a corner of my yard that doesn’t get used.
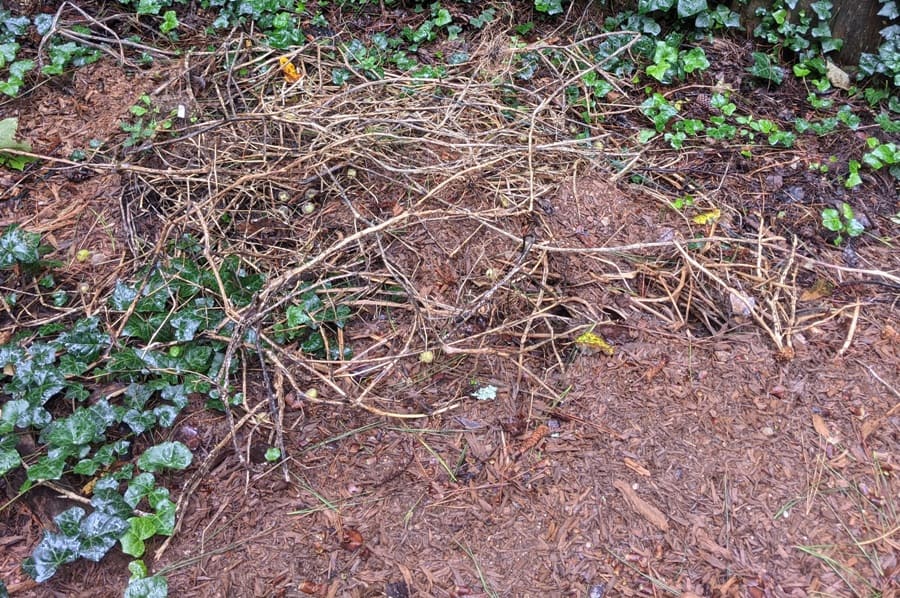
This area is perfect for the larger yard waste items such as limbs and woody plants (I put the tomato and pepper plants in this pile as well).
These can also be trimmed down and put into your regular compost pile.
The important part of compost is the ratio of carbon to nitrogen, especially if you want quicker results. You want an overall ratio C:N ratio of 30:1.
Check out the section below on making compost for more details.
How to Use Compost at Home
When using compost around plants, shrubs, and trees, simply layer it on top of the soil surrounding the plant. The nutrients will filter down through the compost and into the soil.
You can use this same method on your lawn, it is known as top-dressing.
Compost is excellent for seed starting or seedlings. For starting seeds use a mixture of 1 part compost to 3 parts potting soil.
Then fill a container leaving about an inch at the top and plant your seeds as usual. When transplanting seedlings use 1 part compost to 2 parts soil.
Prepping for spring planting or cleaning up in fall is a great time to amend your garden soil.
You can do this by spading in the compost, dig into your garden with a spade, and mix the compost in with the soil.
Your garden beds will thank you!
If digging doesn’t interest you, you can always lay it down as a layer of your no-dig garden bed.
Check out this article on sheet mulching.
How to Make Compost at Home
Air, moisture, and nitrogen are all necessary for breaking down raw materials into compost.
There are many methods of composting, but all require the right mix of materials to create good humus.
Bacteria and fungi play an integral part in creating compost, when starting a new compost pile you may need to inoculate your new pile with either humus from your last compost pile, or go grab some soil from your local woody area (fields and ponds work as well).
This ensures that you are building biodiversity into your soil.
Once you have your microorganisms, you’ll need to feed them.
These decomposers use carbon as an energy source and nitrogen as protein to build up their bodies.
For your compost pile, you want a carbon to nitrogen ratio of 30:1.
Green waste such as vegetable peelings, grass clippings, and plant trimmings are high in nitrogen.
Brown materials such as dry leaves, wood shavings, hay, and straw are carbon-rich.
Manure is high in nitrogen, so while technically brown for compost, it falls in the “green” list. Mixing half brown with half green will yield the proper ratio.
Carbon to Nitrogen Ratio Compost List
| Compost Material | C:N Ratio |
| Finished Compost | 16/1 |
| Dry Leaves | 50/1 |
| Fresh Leaves | 30/1 |
| Dry Grass Clippings | 19/1 |
| Fresh Grass Clippings | 15/1 |
| Newspaper | 800/1 |
| Vegetable Scraps | 13/1 |
| Other Food Waste | 15/1 |
| Wheat Straw | 80/1 |
| Chicken Manure | 13/1 |
| Cow Manure | 19/1 |
| Horse Manure | 25/1 |
| Cardboard | 560/1 |
For a faster breakdown of your materials, smaller pieces compost quicker.
Cutting up vegetable waste and shredding leaves before adding them to your compost means that the micro-organisms can work that much faster.
When it comes to your compost heap size matters. Your compost pile needs to be between 3 and 5 cubic feet. ( 3 to 5 feet per side)
Anything under 3 and your pile won’t be able to retain the heat of the working microbes, over 5 feet and your pile won’t have enough airflow for the microbes at the center.
Heating your compost pile to 130-150 degrees Fahrenheit is necessary to kill off any seeds. Adding cold compost can further spread weed seeds or unwanted plants.
Once you have enough materials and the right size compost pile, turning your compost pile frequently will help to add oxygen for the micro-organism as well as helping it to break down faster. (Berkeley 21 day Method of Composting)
Moisture is critical to life on earth and microbes are no exception.
Water can be applied with a hose or watering can until your compost is as wet as a wrung-out sponge.
Placing your pile in a sheltered, shady spot will also help it to retain moisture.
The amount of time it takes for your pile to turn to compost is dependent upon many factors, and the type of compost bin you use can be a big factor.
Types of Compost Bins
You don’t necessarily need a bin to have a compost pile, but they will help keep everything together and keep the outside of the pile from drying out.
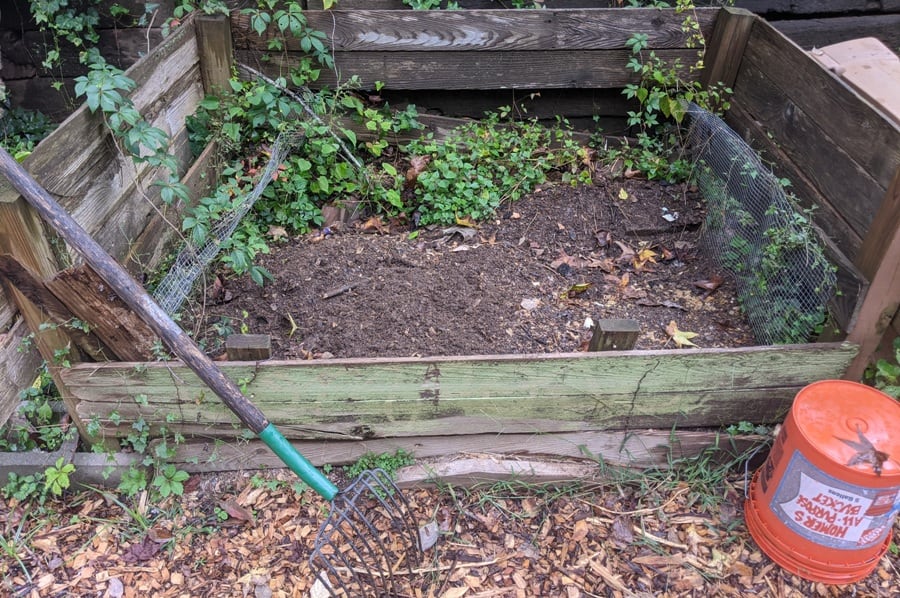
I do recommend having at least a basic bin, one that you build yourself out of scrap materials works just as well as a purchased bin. The one I made is pictured below.
Holding Units For Composting
These units are best for leaves and other yard wastes as they are not turned and can take up to two years to completely break down.
To make an easy holding unit container, hammer 4 stakes into the ground in a cool shady spot, then wrap the stakes with wire or strong plastic netting.
Staple wire into place on each stake.
Leaf Mold, an excellent soil amendment, can be made easily in a holding unit.
Simply rake your autumn leaves, this is best done after a rain so the leaves are wet and you don’t need to wastewater to wet them down and fill your holding bin container with the leaves.
For faster decomposition, run the leaves over with a lawnmower, this both shreds the leaves but also adds the grass clippings to aid in decomp.
Leaf compost can be added even when only partially broken down.
DIY Compost Holding units can also be made with wooden sides that will help your compost pile retain more heat.
The sides still need small gaps or holes to allow airflow. The benefit of retaining heat is a quicker breakdown into compost.
Some compost holding units, like mine, are actually big enough to use as a turning unit, but it has certain disadvantages to a multi-bin setup.
Turning Compost Bin Units
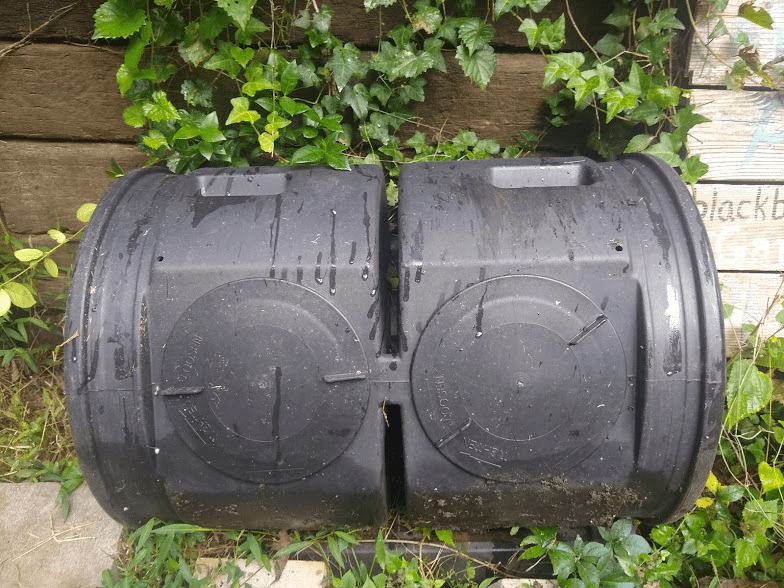
Turning Compost bin units are just that, they turn the compost to speed the decomposition process.
Turning helps to aerate the piles, it also mixes the materials and helps to break up large chunks.
Commercial compost tumblers are available in many varieties and can be helpful for keeping rodents out of your compost pile.
They also take to labor out of turning your compost pile with a shovel and are a great option for a suburban backyard, when containing the smell and keeping your yard looking neat are much-needed options.
There are turning compost bins that are up off the ground with a crank available to turn the compost inside.
These types of compost bins are good for people with limited or restricted mobility, as there is little to no bending needed to turn your compost.
Other turning compost bins sit on the ground, some even have a base on the bottom that catches the runoff from your compost and turns it into compost tea!
You also have the option of having one bin or two bins. Two bins give you the space to start a second compost pile while the first is still breaking down.
Commercial composting bins can range in price anywhere from $89 – $300+.
Depending on the bin you may have a difficult time getting the compost out, as some of these bins only have a small opening that is difficult to reach into.
If commercial composting bins don’t appeal to you, then homemade compost bins work just as well.
I’m partial to my compost pile which is just scrap fencing and leftover chicken wire.
I have enough space inside to turn my compost, the main drawback being that I turn it by hand with a pitchfork.
Want to build your own turning DIY compost bin? Check out this video from HGTV, they made this compost bin for under $50 dollars.
A lot of gardeners I know that have a lot of yard and vegetable waste for compost use a 3 bin method.
The bins can be commercial bins or made from anything from pallets to trash bins. The first bin is for new or fresh materials.
The advantage to this is that you can continuously be making compost, by allowing the first bin to fill up and then transferring it all to a second bin, you start filling the first bin back up with new scraps while the second bin keeps breaking down.
You want to wait until your compost has reached a temp of 140-150 degrees Fahrenheit before transferring to the second bin.
Once in the second bin, the material can stay there until your first bin is full again and ready to transfer.
Once in the third bin, it will finish the decomposition process.
By the time your first bin is full and ready to move the third bin should be ready for use!
Berkeley 21 day method of composting
The Berkeley method is a labor-intensive quick method of rapid composting. The heat of the pile and the rotation of the materials means that you can have usable compost in as little as 21 days!
There are a few things that are needed to make this rapid composting work well.
To start make sure that all the material that you add has been chopped up no longer than a finger, run over leaf clippings with a lawnmower, chop grass clippings with a machete and chop kitchen waste into 1-inch pieces.
For this compost pile make your pile one-third green material and two-thirds brown material.
An easy way to measure this is in buckets, for every bucket full of nitrogen-rich ingredients add two buckets of carbon-rich ingredients.
Bins for this composting process should be at least 3×3, but no larger than 4×4.
To start, layer your ingredients in thin layers of green then brown once layered wet your compost pile. It should feel like a wrung-out sponge.
Let your pile sit for 24-48 hours to allow the temperature to rise to around 140 degrees Fahrenheit.
Once it has reached this temperature it is time to turn your compost pile.
Heating your pile over 160 degrees will kill the beneficial bacteria, meaning you will have to start over.
To turn your pile, use a garden fork and start on the outside edges and move them to your new compost pile spot (I just move mine from side to side in my bin).
This will form the new base and will now move to the inside of the pile, continue and move the inside of the pile to the outside.
Check the moisture again and add water if needed. Wait until the internal temperature reaches around 140 degrees, between 1 and 4 days, then turn again.
At this point you will turn your pile every other day, allowing the pile to rest one day between turns.
At anywhere from 18-21 days your compost should be ready to use.
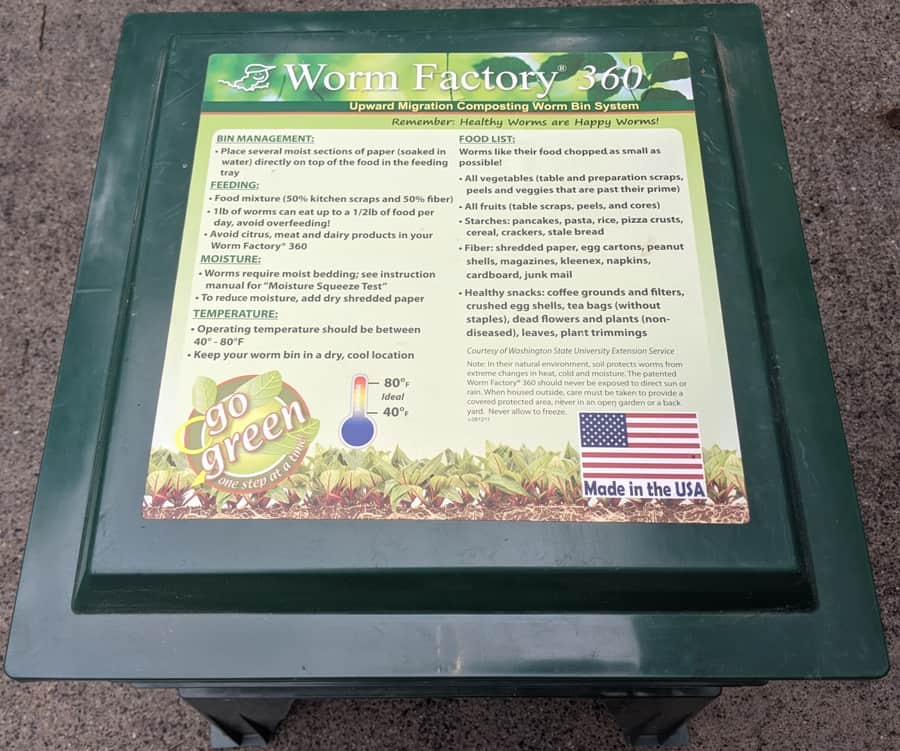
Worm Compost Bins
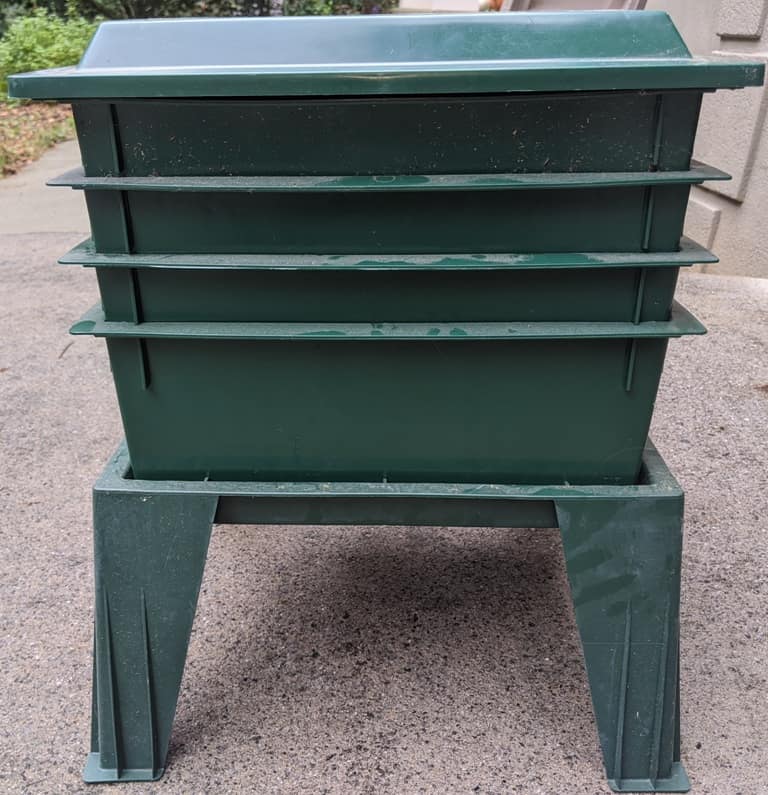
Worm composters are ideal for those living in small apartments with limited outdoor space or those that just wish to compost kitchen scraps.
These bins are also great for teaching kids about compost and recycling.
Worm bins take up a small amount of space and in the end, you get all the lovely worm castings, also known as vermicompost as a wonderful addition to your lawn or garden.
Commercial worm bins are available and you also need to purchase worms and bedding when getting started, if you are not gathering your own worms.
The worm bin I use is this and I get my worms from Uncle Jim’s Worm Farm. The starter kit comes with everything that you need.
I use the worm factory 360 composter which you can check the price on Amazon here
DIY Worm Compost Bin
To make your own DIY worm compost bin you will need two plastic storage boxes, 8-10 gallons each. A drill with 1/4 and 1/16 inch bits. Newspaper and of course red worms (about 1 lbs).
To start, drill about 20 evenly spaced holes on the bottom of each bin. Holes allow for drainage and give the worms a way to crawl into the second bin.
Next, drill holes for ventilation. These holes should be drilled on the upper sides of the bins, about 1.5 inches apart. Use the 1/16th inch drill bit.
Don’t forget to add holes to the top as well, you should have about 30 holes on top for proper ventilation.
Now that the bins are ready, you will need bedding for your worms.
Newspaper shredded into 1-inch strips make the perfect bedding. Moisten newspaper, being sure to squeeze out any excess water.
Leaves or leaf litter can also be added to the bedding.
Cover the bottom of the top bin with your bedding making it 3 to 4 inches deep. Add a handful of dirt to help them digest and break down their food.
If you have purchased worms add them now, otherwise you can set out a large piece of cardboard on your lawn at night and draw the worms up that way.
In the morning lift the cardboard and gather the worms.
Add your kitchen scraps, you will need a 2:1 ratio of worms to kitchen scraps, which is half a pound of food wastes per day per pound of worms.
One pound of worms is about 500 worms.
After adding your food wastes, dampen a piece of cardboard to fit over your worms and cover them.
Place your bin in a shady, well-ventilated area. If you’re using homemade bins place it on bricks to allow for drainage underneath.
To catch the moisture that drains, also known as worm tea, place the lid of the second bin underneath. The worm tea makes for excellent liquid fertilizer.
Start off feeding your worms slowly and allow them to multiply. When feeding your worms, bury the food scraps a little to help keep fruit flies away.
Once the first bin is full, and you can no longer recognize the scraps, place new bedding and food into your second bin.
It should take between one to two months before all the worms have moved to the second bin and the first is ready for use.
Once you have emptied the first bin place it beneath the second bin and the process begins again!
Conclusion
If you’re going to have a vegetable garden you should create a compost pile to aid in growing the biggest and best vegetables possible for your family and friends.
Learning how to compost at home is easy to do once you have the knowledge and it doesn’t take much time once you have a system in set up.
Just remember to turn-over you’re compost pile and the rest will fall into place.